Fragment是Android 3.0 新增加的部分,它的作用是将Activity拆分成多个完全独立封装的可重用的组件,每个组件都有它们的生命周期和UI布局。这样就可以为不同屏幕大小的设备创建动态灵活的UI。
创建并添加Fragment 在layout文件夹下新建一个名为fragment1.xml的布局文件
<LinearLayout xmlns:android ="http://schemas.android.com/apk/res/android" android:layout_width ="match_parent" android:layout_height ="match_parent" > <TextView android:layout_width ="wrap_content" android:layout_height ="wrap_content" android:text ="This is fragment 1" /> </LinearLayout >
新建一个fragment2.xml
<LinearLayout xmlns:android ="http://schemas.android.com/apk/res/android" android:layout_width ="match_parent" android:layout_height ="match_parent" > <TextView android:layout_width ="wrap_content" android:layout_height ="wrap_content" android:text ="This is fragment 2" /> </LinearLayout >
新建一个类Fragment1,这个类继承自Fragment
public class Fragment1 extends Fragment public View onCreateView(LayoutInflater inflater, ViewGroup container, Bundle savedInstanceState) { return inflater.inflate(R .layout.fragment1, container, false ); } }
新建一个类Fragment2 :
public class Fragment2 extends Fragment public View onCreateView(LayoutInflater inflater, ViewGroup container, Bundle savedInstanceState) { return inflater.inflate(R .layout.fragment2, container, false ); } }
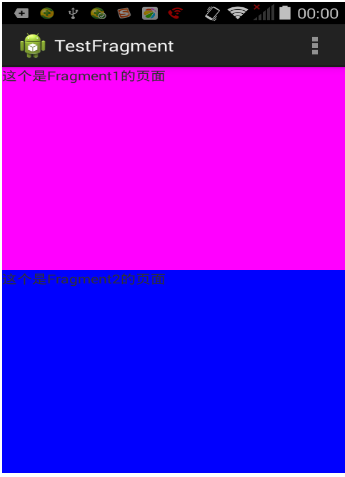
静态创建Fragment 然后打开或新建activity_main.xml作为主Activity的布局文件,在里面加入两个Fragment的引用,使用android:name前缀来引用具体的Fragment: <LinearLayout xmlns:android ="http://schemas.android.com/apk/res/android" android:layout_width ="match_parent" android:layout_height ="match_parent" android:baselineAligned ="false" > <fragment android:id ="@+id/fragment1" android:name ="com.example.fragmentdemo.Fragment1" android:layout_width ="0dip" android:layout_height ="match_parent" android:layout_weight ="1" /> <fragment android:id ="@+id/fragment2" android:name ="com.example.fragmentdemo.Fragment2" android:layout_width ="0dip" android:layout_height ="match_parent" android:layout_weight ="1" /> </LinearLayout >
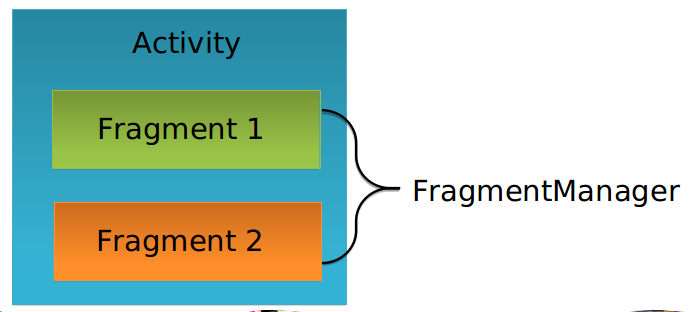
动态创建Fragment Fragment Manager 每个Activity都包含一个Fragment Manager来管理寄生于它的Fragment们,可以通过使用getFragmentManager方法来访问FragmentManger:
FragmentManager fragmentManager = getFragmentManager()
获得FragmentManager后可以做如下操作:�
通过findFragmentById()或findFragmentByTag(),获取activity中的Fragment引用。
通过popBackStack()方法,从activity的后退栈中弹出fragment
通过addOnBackStackChangedListerner()注册一个侦听器监视后退栈的变化。
通过beginTransaction()获取FragmentTransaction。
Fragment Transaction 用来在Activity内添加,删除替换Fragment,使用Fragment Transaction 可以让布局成为动态。提交一组Fragment的变化叫做一个事务。事务通过FragmentTransaction来执行。还可以把每个事务保存在activity的后退栈中,这样就可以让用户在Fragment变化之间导航.
FragmentTransaction fragtransaction = fragmentManager.beginTransaction()
主界面布局
<LinearLayout xmlns:android ="http://schemas.android.com/apk/res/android" android:id ="@+id/main_layout" android:layout_width ="match_parent" android:layout_height ="match_parent" > </LinearLayout >
public class MainActivity extends Activity { protected void onCreate(Bundle savedInstanceState ) { super.onCreate(savedInstanceState ) ; setContentView(R.layout .activity_main ) ; Display display = getWindowManager() .getDefaultDisplay() ; if (display.getWidth() > display.getHeight() ) { Fragment1 fragment1 = new Fragment1() ; getFragmentManager() .begin Transaction() .replace(R .() ; } else { Fragment2 fragment2 = new Fragment2() ; getFragmentManager() .begin Transaction() .replace(R .() ; } } }
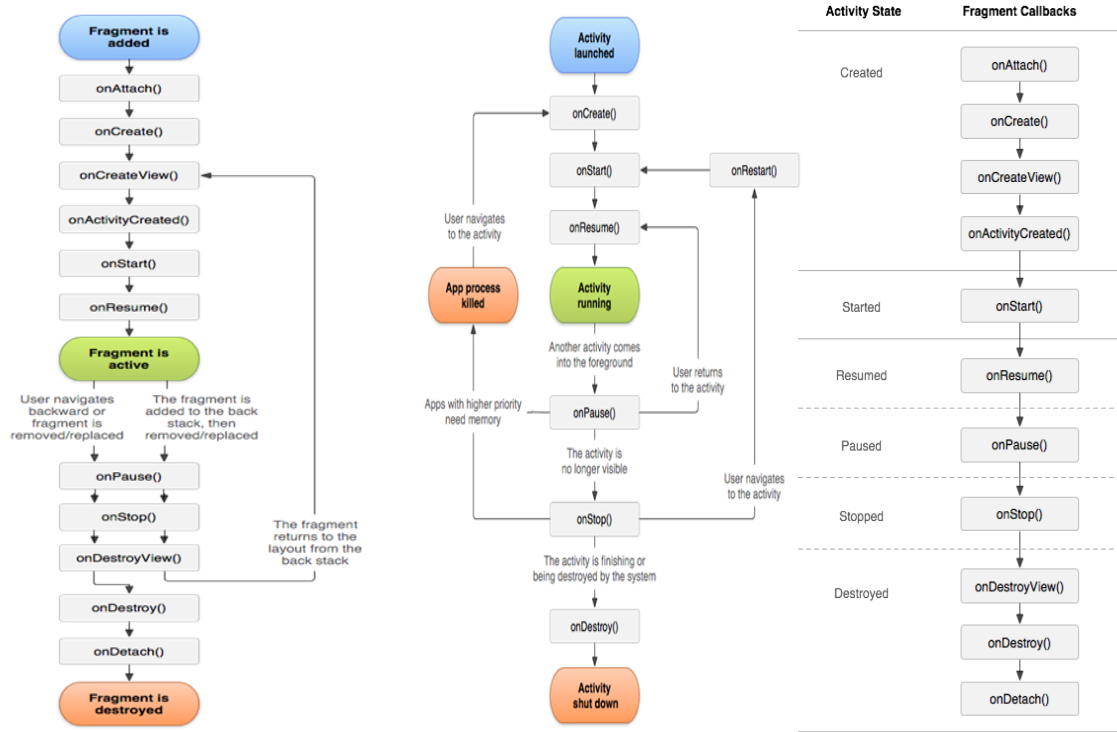
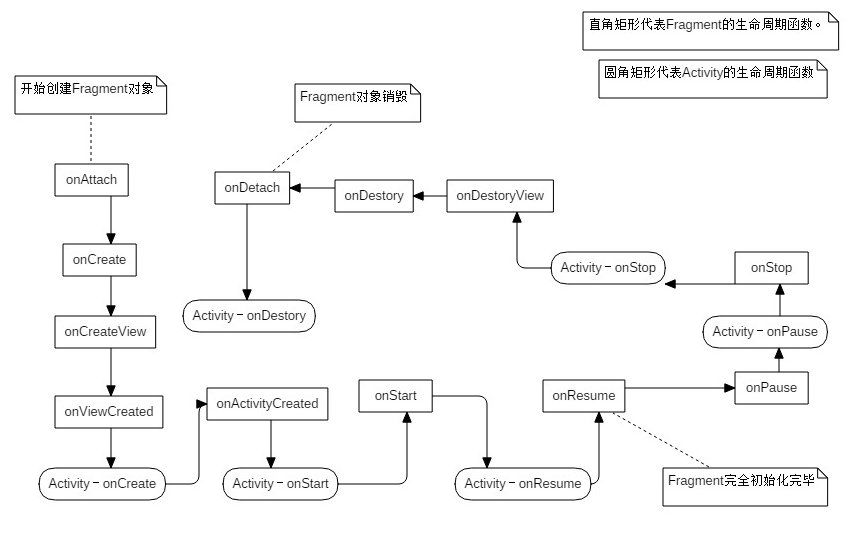
Fragment生命周期与Activity生命周期
onAttach:当fragment和它的父activity有关联的时候被调用,在此处可以获取Activity的引用。为进一步初始化做准备。
onCreate:调用该方法来进行Fragment的初始化。与Activity不同Fragment UI不在onCreate方法中初始化。
onCreateView:一旦Fragment被创建,要创建它自己的用户界面的时候调用该方法,在里面主要完成创建或者填充Fragment UI的工作,获取它所包含的View的引用以及绑定到该View的数据,创建所需的Server和Timer。
onActivityCreated:一旦父Activity和Fragment的UI创建后,通知fragment activity已经创建完成,在这个方法中主要完成父Activity被初始化完成或者Fragment的View被完全填充后才能做的事情。要和父Activity的UI交互也要等到这个阶段。
onStart:使fragment对用户可见(基于包含它的activity已经启动了)
onResume:使fragment与用户可进行交互(基于包含它的activity已经处于resume状态)在这个方法中主要工作是恢复所有暂停的Fragment需要的UI更新,线程或进程。这些在非活动状态是处于暂停的。
onPause:fragment不再与用户进行交互,要么由于activity处于暂停态,要么由于在activity中一个fragment的操作正在被修改,需要暂停UI的更新,挂起线程或者暂停那些不需要更新的CPU的集中处理,由于调用这个方法后,进程可能被终止,所以要保存所有的编辑和状态改变信息。
onStop:fragment不再与用户可见,要么因为它的activity被停止,要么因为在activity中一个fragment的操作正在被修改,在这里暂停其余的UI更新,挂起线程或者暂停不需要的处理
onDestroyView: 当Fragment的View被分离的时候调用该方法,这里主要用于清除资源相关的View。
onDestroy: 在整个生命周期结束的时候调用该方法去做fragment状态的最终清理,包括清除所有的资源,包括线程和关闭数据库连接。
onDetach:当fragment与其父activity分离的时候调用该方法。
onPause:fragment不再与用户进行交互,要么由于activity处于暂停态,要么由于在activity中一个fragment的操作正在被修改,需要暂停UI的更新,挂起线程或者暂停那些不需要更新的CPU的集中处理,由于调用这个方法后,进程可能被终止,所以要保存所有的编辑和状态改变信息。
内置的Fragment
DialogFragment
ListFragment
PreferenceFragment
Fragment之间进行通信 通常情况下,Activity都会包含多个Fragment,这时会遇到多个Fragment之间如何进行通信的问题。
fragment1.xml
<LinearLayout xmlns:android ="http://schemas.android.com/apk/res/android" > <TextView android:id ="@+id/fragment1_text" android:text ="This is fragment 1" /> </LinearLayout >
fragment2.xml
<LinearLayout xmlns:android ="http://schemas.android.com/apk/res/android" android:orientation ="vertical" > <TextView android:text ="This is fragment 2" /> <Button android:id ="@+id/button" android:text ="Get fragment1 text" /> </LinearLayout >
public class Fragment2 extends Fragment { public View onCreateView(LayoutInflater inflater , ViewGroup container , Bundle savedInstanceState ) { return inflater.inflate(R .false ); } public void onActivityCreated(Bundle savedInstanceState ) { super.onActivityCreated(savedInstanceState ) ; Button button = (Button) getActivity() .findViewById(R.id .button ) ; button.setOnClickListener(new OnClickListener() { public void onClick(View v ) { TextView textView = (TextView) getActivity() .findViewById(R.id .fragment1_text ) ; Toast .Text(getActivity () , textView.getText() , Toast.LENGTH_LONG).show() ; } }); } }
兼容多种屏幕方案 创建窄屏主布局文件 打开或新建res/layout/activity_main.xml作为程序的主布局文件
<LinearLayout xmlns:android ="http://schemas.android.com/apk/res/android" xmlns:tools ="http://schemas.android.com/tools" android:layout_width ="fill_parent" android:layout_height ="fill_parent" android:orientation ="horizontal" tools:context =".MainActivity" > <fragment android:id ="@+id/menu_fragment" android:name ="com.example.fragmentdemo.MenuFragment" android:layout_width ="fill_parent" android:layout_height ="fill_parent" /> </LinearLayout >
创建宽屏主布局文件 在res目录下新建layout-large目录,然后这个目录下创建新的activity_main.xml
<LinearLayout xmlns:android ="http://schemas.android.com/apk/res/android" xmlns:tools ="http://schemas.android.com/tools" android:orientation ="horizontal" android:baselineAligned ="false" tools:context =".MainActivity" > <fragment android:id ="@+id/left_fragment" android:name ="com.example.fragmentdemo.MenuFragment" android:layout_width ="0dip" android:layout_height ="fill_parent" android:layout_weight ="1" /> <FrameLayout android:id ="@+id/details_layout" android:layout_width ="0dip" android:layout_height ="fill_parent" android:layout_weight ="3" > </FrameLayout > </LinearLayout >
menu_fragment.xml文件
<?xml version="1.0" encoding="UTF-8" ?> <LinearLayout xmlns:android ="http://schemas.android.com/apk/res/android" android:layout_width ="fill_parent" android:layout_height ="fill_parent" > <ListView android:id ="@+id/menu_list" android:layout_width ="fill_parent" android:layout_height ="fill_parent" > </ListView > </LinearLayout >
public class MenuFragment extends Fragment implements OnItemClickListener { private ListView menuList; private ArrayAdapter<String> adapter; private String[] menuItems = { "Sound" , "Display" }; private boolean isTwoPane; public void onAttach(Activity activity ) { super.onAttach(activity ) ; adapter = new ArrayAdapter<String>(activity, android.R . } public View onCreateView(LayoutInflater inflater , ViewGroup container , Bundle savedInstanceState ) { View view = inflater.inflate(R .false ); menuList = (ListView) view.findViewById(R.id .menu_list ) ; menuList.setAdapter(adapter ) ; menuList.setOnItemClickListener(this ) ; return view; } public void onActivityCreated(Bundle savedInstanceState ) { super.onActivityCreated(savedInstanceState ) ; if (getActivity() .findViewById(R.id .details_layout ) != null) { isTwoPane = true ; } else { isTwoPane = false ; } } public void onItemClick(AdapterView<?> arg0 , View view , int index , long arg3 ) { if (isTwoPane) { Fragment fragment = null; if (index == 0 ) { fragment = new SoundFragment() ; } else if (index == 1 ) { fragment = new DisplayFragment() ; } getFragmentManager() .begin Transaction() .replace(R .() ; } else { Intent intent = null; if (index == 0 ) { intent = new Intent(getActivity () , SoundActivity .class ); } else if (index == 1 ) { intent = new Intent(getActivity () , DisplayActivity .class ); } startActivity(intent ) ; } }
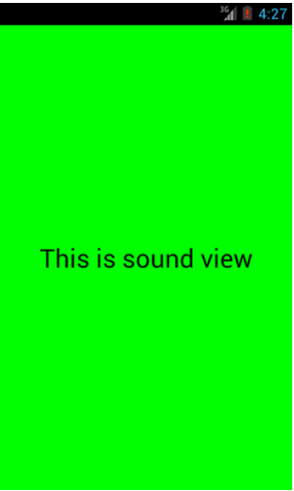
sound_fragment.xml布局文件
<?xml version="1.0" encoding="utf-8" ?> <RelativeLayout xmlns:android ="http://schemas.android.com/apk/res/android" android:layout_width ="match_parent" android:layout_height ="match_parent" android:background ="#00ff00" android:orientation ="vertical" > <TextView android:layout_centerInParent ="true" android:textSize ="28sp" android:textColor ="#000000" android:text ="This is sound view" /> </RelativeLayout >
SoundFragment类
public class SoundFragment extends Fragment public View onCreateView(LayoutInflater inflater, ViewGroup container, Bundle savedInstanceState) { View view = inflater.inflate(R .layout.sound_fragment, container, false ); return view; } }
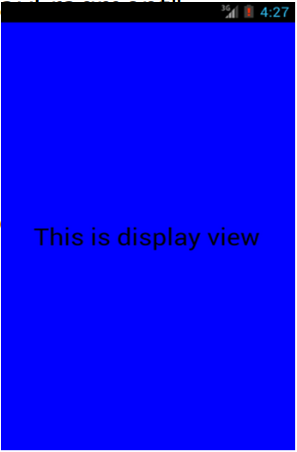
display_fragment.xml布局文件
<?xml version="1.0" encoding="utf-8" ?> <RelativeLayout xmlns:android ="http://schemas.android.com/apk/res/android" android:layout_width ="match_parent" android:layout_height ="match_parent" android:background ="#0000ff" android:orientation ="vertical" > <TextView android:layout_centerInParent ="true" android:textSize ="28sp" android:textColor ="#000000" android:text ="This is display view" /> </RelativeLayout >
DisplayFragment类
public class DisplayFragment extends Fragment public View onCreateView(LayoutInflater inflater, ViewGroup container, Bundle savedInstanceState) { View view = inflater.inflate(R .layout.display_fragment, container, false ); return view; } }
sound_activity.xml
<?xml version="1.0" encoding="utf-8" ?> <fragment xmlns:android ="http://schemas.android.com/apk/res/android" android:id ="@+id/sound_fragment" android:name ="com.example.fragmentdemo.SoundFragment" android:layout_width ="match_parent" android:layout_height ="match_parent" > </fragment >
SoundActivity
public class SoundActivity extends Activity protected void onCreate(Bundle savedInstanceState) { super .onCreate(savedInstanceState); setContentView(R .layout.sound_activity); } }
display_activity.xml
<?xml version="1.0" encoding="utf-8" ?> <fragment xmlns:android ="http://schemas.android.com/apk/res/android" android:id ="@+id/display_fragment" android:name ="com.example.fragmentdemo.DisplayFragment" android:layout_width ="match_parent" android:layout_height ="match_parent" > </fragment >
DisplayActivity类
public class DisplayActivity extends Activity protected void onCreate(Bundle savedInstanceState) { super .onCreate(savedInstanceState); setContentView(R .layout.display_activity); } }
Fragment与Activity共享事件处理方法 在Fragment需要和主Activity共享和事件的地方,可以在Fragment中创建一个callback接口,主Acitivity来实现它:如下所示:
Public interface sharedFunction { public void sharefun () }
在Acitivity中实现后,在Fragment中可以如下访问:
sharedFunction shared = (sharedFunction )activity;Shared. sharefun();